
How To Get Verified Nostr Profile On Damus
A step-by-step guide for Nostr Damus profile verification using a custom domain and GitHub Pages.

What you will need:
A web domain you own.
A website hosted on GitHub Pages for your owned domain.
A Damus account.
Step 1: Access Damus Username & Public Key
Launch the Damus app on your mobile device. In this tutorial, we’ll be using Damus for iOS.
Navigate to the app Settings page and copy your public account ID.
Step 2: Convert Your Public Key To Hex Format
Launch your web browser and navigate to the Damus Key Converter page.
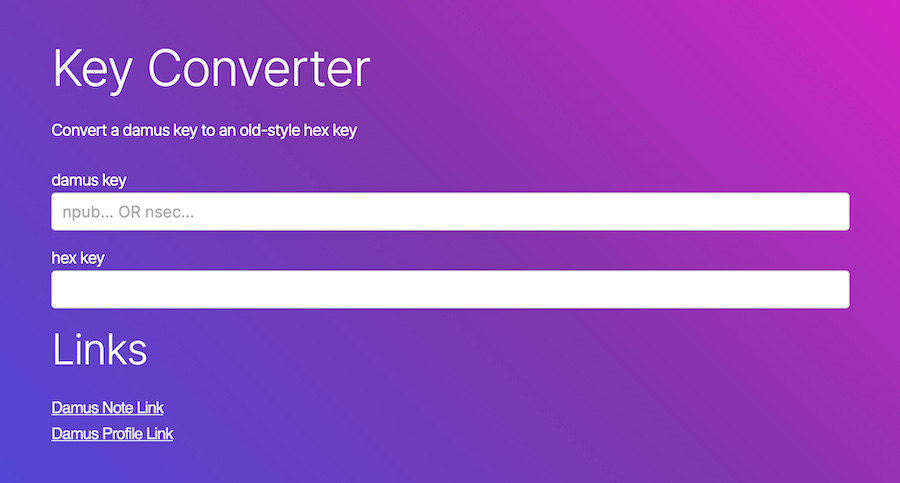
Paste in your public account ID key into the first box labeled “damus key”. A hex version of your key will immediately populate the second box labeled “hex key”.
Copy the hex key from the second box.
Step 3: Access Your Hosted Website
Launch your web browser and log into the website hosting service where your website is hosted. In this tutorial, the hosting service is GitHub Pages.
Navigate to the root folder of your website.
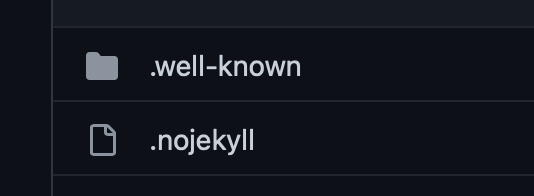
Step 4: Create a .nojekyll File
In the root folder, create a new, empty file named, “.nojekyll”, making sure to include the preceding period.
Commit the .nojekyll file to save it.
Step 5: Create a .well-known Folder
In the root folder, create a new folder named, “.well-known”, making sure to include the preceding period.
Your website root folder should now have the folder and file you just created as shown below:
Navigate into the .well-known folder you just created.
Step 6: Create a _config.yaml File
Create a new file in that folder named, “_config.yaml”. Enter the following code into the file as shown below:

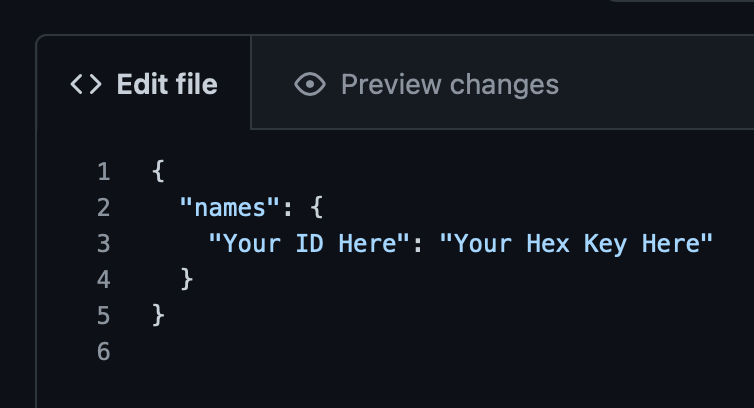
Step 7: Create a nostr.json File
In the .well-known folder, create a new file named, “nostr.json”.
Enter the code below replacing “Your ID Here” with your Damus user ID and “Your Hex Key Here” with the hex key you copied from the Damus converter.
Commit the nostr.json file to save it.
Step 8: See If It Works
Close the Damus app and wait two to five minutes.
Reopen the Damus app and check your profile to see if you now have the verification check badge and your website displayed next to your username.
Step 9: Like & Subscribe
If this helped you out, gimme a like.
If you’d like to follow me for other tutorials or information I post, consider subscribing. 😁